Ultimate Guide to Ford Bronco Accessories with Broaddict
Discover the ultimate Ford Bronco accessories guide with Broaddict for fit, function, and smart upgrades from roof racks to gear.
Why Broaddict is on Every Bronco Owner’s Radar
- Why Broaddict is on Every Bronco Owner’s Radar
- The Accessory Stack That Actually Changes Your Bronco (priorities before you buy anything)
- Broaddict Brand Overview: What they sell, who it’s for, and what makes them different
- Start Here: Roof Racks for the Bronco (what matters more than looks)
- Broaddict Roof Rack Cross Bar Kit Review (Ford Bronco 2021–2025): Build quality, design, and real-world use
- Roof Rack Noise: The real causes (and why some racks whistle like crazy)
- How to Reduce Wind Noise While Driving (practical fixes that don’t require a new rack)
- Aerodynamics 101 for Bronco Roof Racks: Quiet, stable, and less drag
- Fuel Efficiency with Roof Racks: What to expect (and how to minimize the hit)
- Accessory Pairing Guide: What to mount on your Broaddict cross bars (without turning the roof into a wind instrument)
- Installation and Setup Notes (what to double-check for a clean, quiet install)
- Real-World Scenario: Packing for a Yellowstone National road trip in a Bronco
- Is Broaddict Worth It? Who should buy (and who should look elsewhere)
- Wrap-up: Build your Bronco in the right order (and keep it quiet)
Why Broaddict is on Every Bronco Owner’s Radar
Broaddict has become an essential topic of discussion among Bronco owners. This guide will explore the reasons why Broaddict is gaining popularity and what you need to know about it.
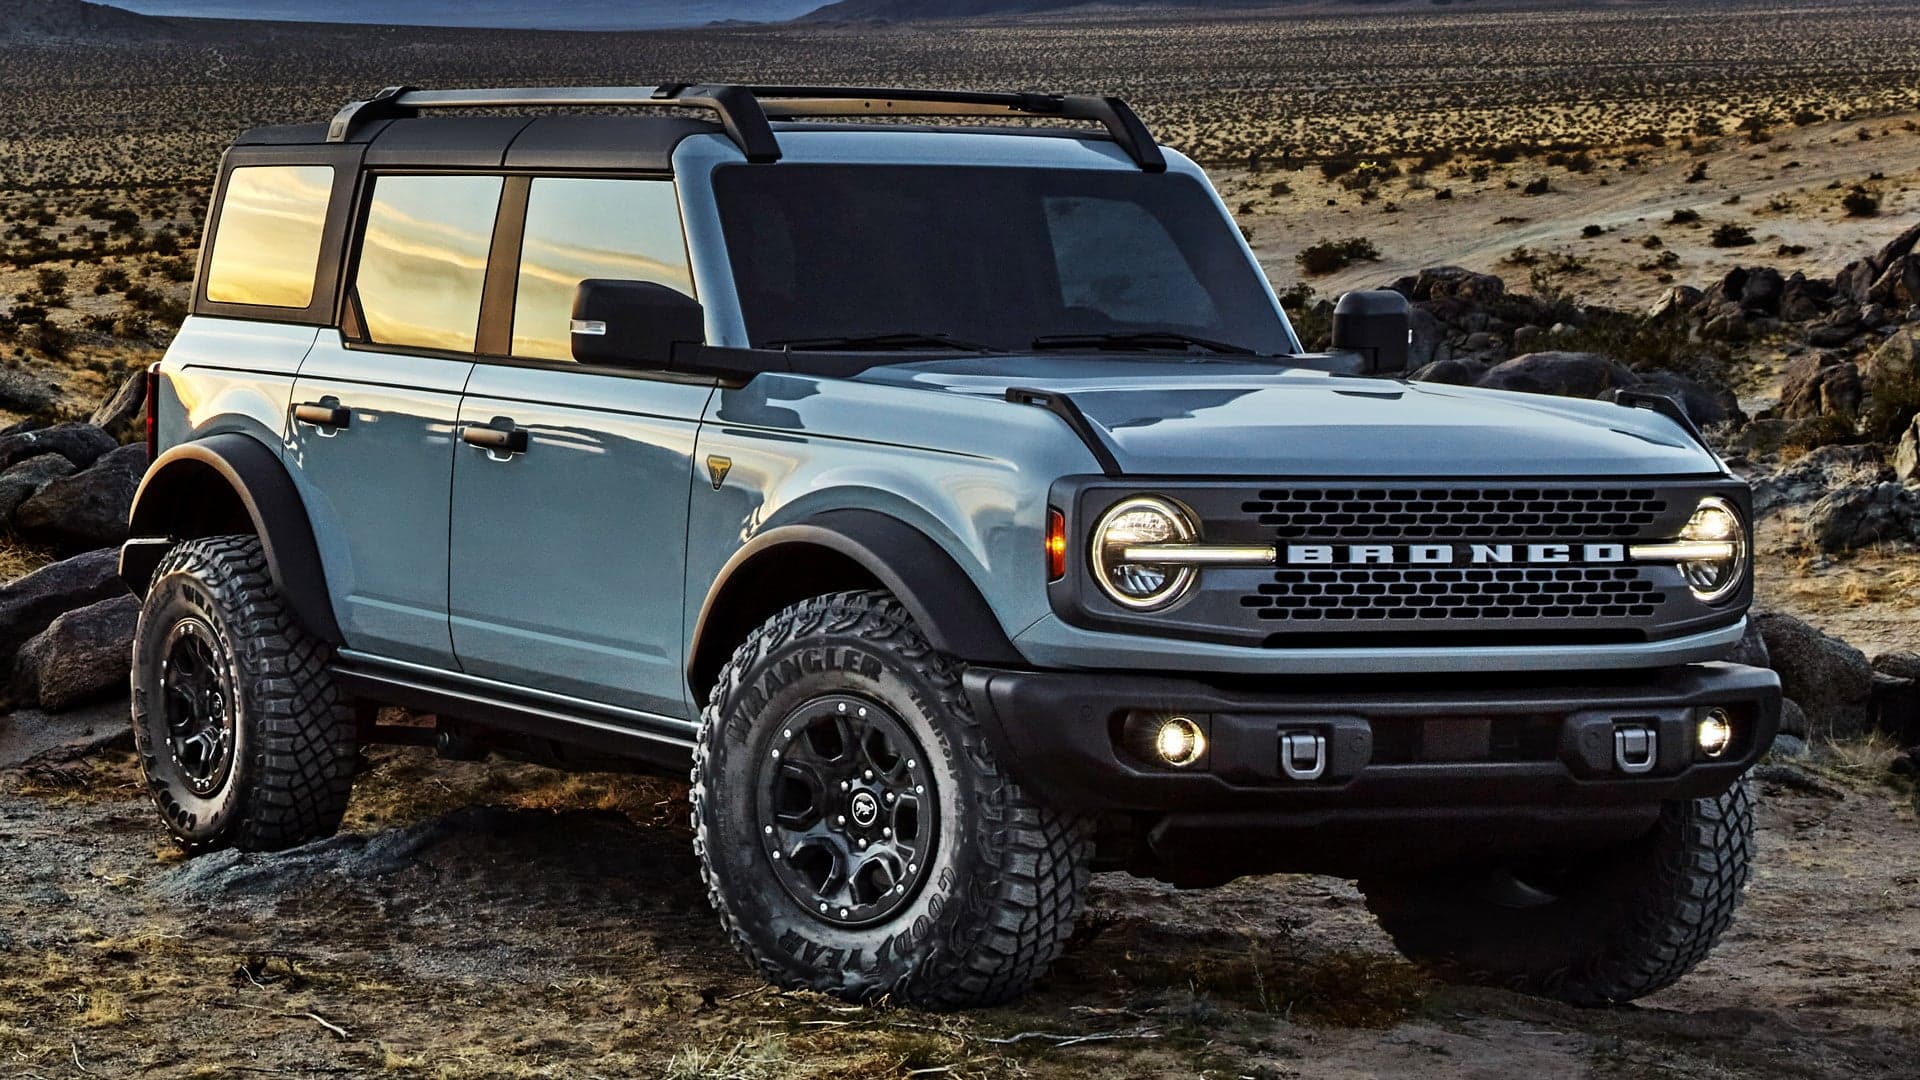
If you’ve spent more than 10 minutes in a Ford Bronco group, you already know the truth: Bronco owners obsess over accessories.
Not because they need to. But because accessories are what turn a Bronco from “cool SUV” into your Bronco—more capable off-road, more comfortable on-road, and (let’s be real) better-looking in every parking lot photo.
This guide is built to be practical, not hype.
Here’s what you’re going to get:
- A simple way to prioritize accessories so you don’t waste money (or buy stuff twice).
- A focused look at roof racks/cross bars, because that’s usually the first upgrade that unlocks real utility.
- A Broaddict-centered review of the Broaddict Roof Rack Cross Bar Kit for 2021–2025 Ford Bronco 2-Door and 4-Door models, including the things people actually care about: fit, noise, aerodynamics, install experience, and value.
And a quick note on why Broaddict keeps popping up: they position themselves as a dedicated Bronco component service team with a “built by enthusiasts, for everyone” approach—and in plain English, that typically means:
- They focus on fitment and Bronco-specific use cases (not generic universal parts).
- They aim to keep buying parts easy, fun, and affordable.
- You’re not guessing whether something is meant for your Bronco… or kinda meant for it.
This is for 2021–2025 Bronco owners (2-Door and 4-Door), whether you’re:
- Daily driving and want less annoyance and more utility,
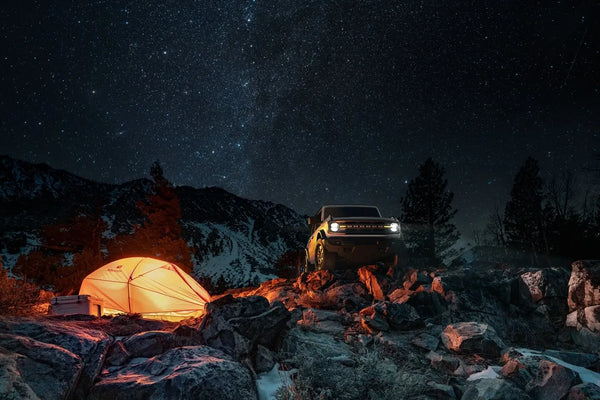
- Weekend trail riding,
- Or building a camping/overland setup that’s actually usable.
You’ll also see “Shop Now” / “Buy Now” placed where it makes sense – right at decision moments – so you can move when you’re ready.
The Accessory Stack That Actually Changes Your Bronco (priorities before you buy anything)
Here’s the mindset that saves you money: don’t buy accessories randomly – build an accessory stack.
Think of it like layers. The bottom layers unlock capability. The top layers are comfort, convenience, and aesthetics.
The “Accessory Stack” (in the order that usually makes sense)
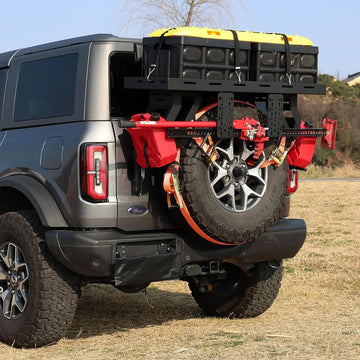
- Cargo carrying (roof racks/cross bars, interior cargo solutions)
- Protection (floor liners, seat covers, rock protection, mud flaps)
- Recovery readiness (recovery points, straps, boards, basic tools)
- Camping/overland utility (awning, storage, lighting, power)
- Quality-of-life + looks (steps, trim accents, interior upgrades)
Most people think they’re buying for style. But the first upgrades that truly change your Bronco are the ones that solve these three goals:
The 3 most common Bronco accessory goals
- Quieter daily driving
- More cargo capacity
- Readiness for off-road trips (without packing like a raccoon)
Now the warning that matters: the fastest way to waste money is to ignore fitment and tradeoffs.
How to avoid wasted spend
- Fitment first: 2-Door vs 4-Door matters. So does roof type and trim details. Confirm compatibility before you click “Buy.”
- Be honest about use: highway commuting needs different priorities than rocky trails.
- Accept the tradeoffs: racks and gear can add noise and reduce MPG – your job is to choose a setup that minimizes the penalty.
That’s why roof racks are often the first “big” upgrade: they unlock camping and hauling without forcing you into a trailer or permanent interior clutter.
Broaddict Brand Overview: What they sell, who it’s for, and what makes them different
Broaddict describes themselves as a dedicated Bronco component service team with a simple promise: buying parts should be easy, fun, and affordable –“built by enthusiasts, for everyone.”
Translated into buyer terms, Broaddict tends to appeal to owners who want:
- Bronco-specific parts without luxury-brand pricing,
- Clear “does this fit my Bronco?” purchasing confidence,
- And functional upgrades that don’t require turning the build into a second job.
What Broaddict typically sells (high-level categories)
Without pretending we’re listing every SKU, the Broaddict ecosystem for Broncos generally lives in categories like:
- Roof rack systems / cross bars
- Gear-carrying add-ons (mounting solutions for outdoor use)
- Wind management add-ons (the kind of small things that can make a big difference in noise and comfort)
What to look for in any Bronco accessory brand (Broaddict included)
Before you hit Shop Now, check for these basics:
- Clear fitment notes (2-Door vs 4-Door, roof types, model years)
- Install documentation (even simple photos/steps help)
- Material specs (aluminum vs steel, corrosion resistance)
- Warranty/returns (clear policy, not vague)
- Responsive support (especially for fitment questions)
Where Broaddict fits in the market
Broaddict generally sits in the “smart value” lane: functional upgrades that don’t cost what the most premium rack systems cost-especially for owners who want a strong foundation first, then add accessories over time.
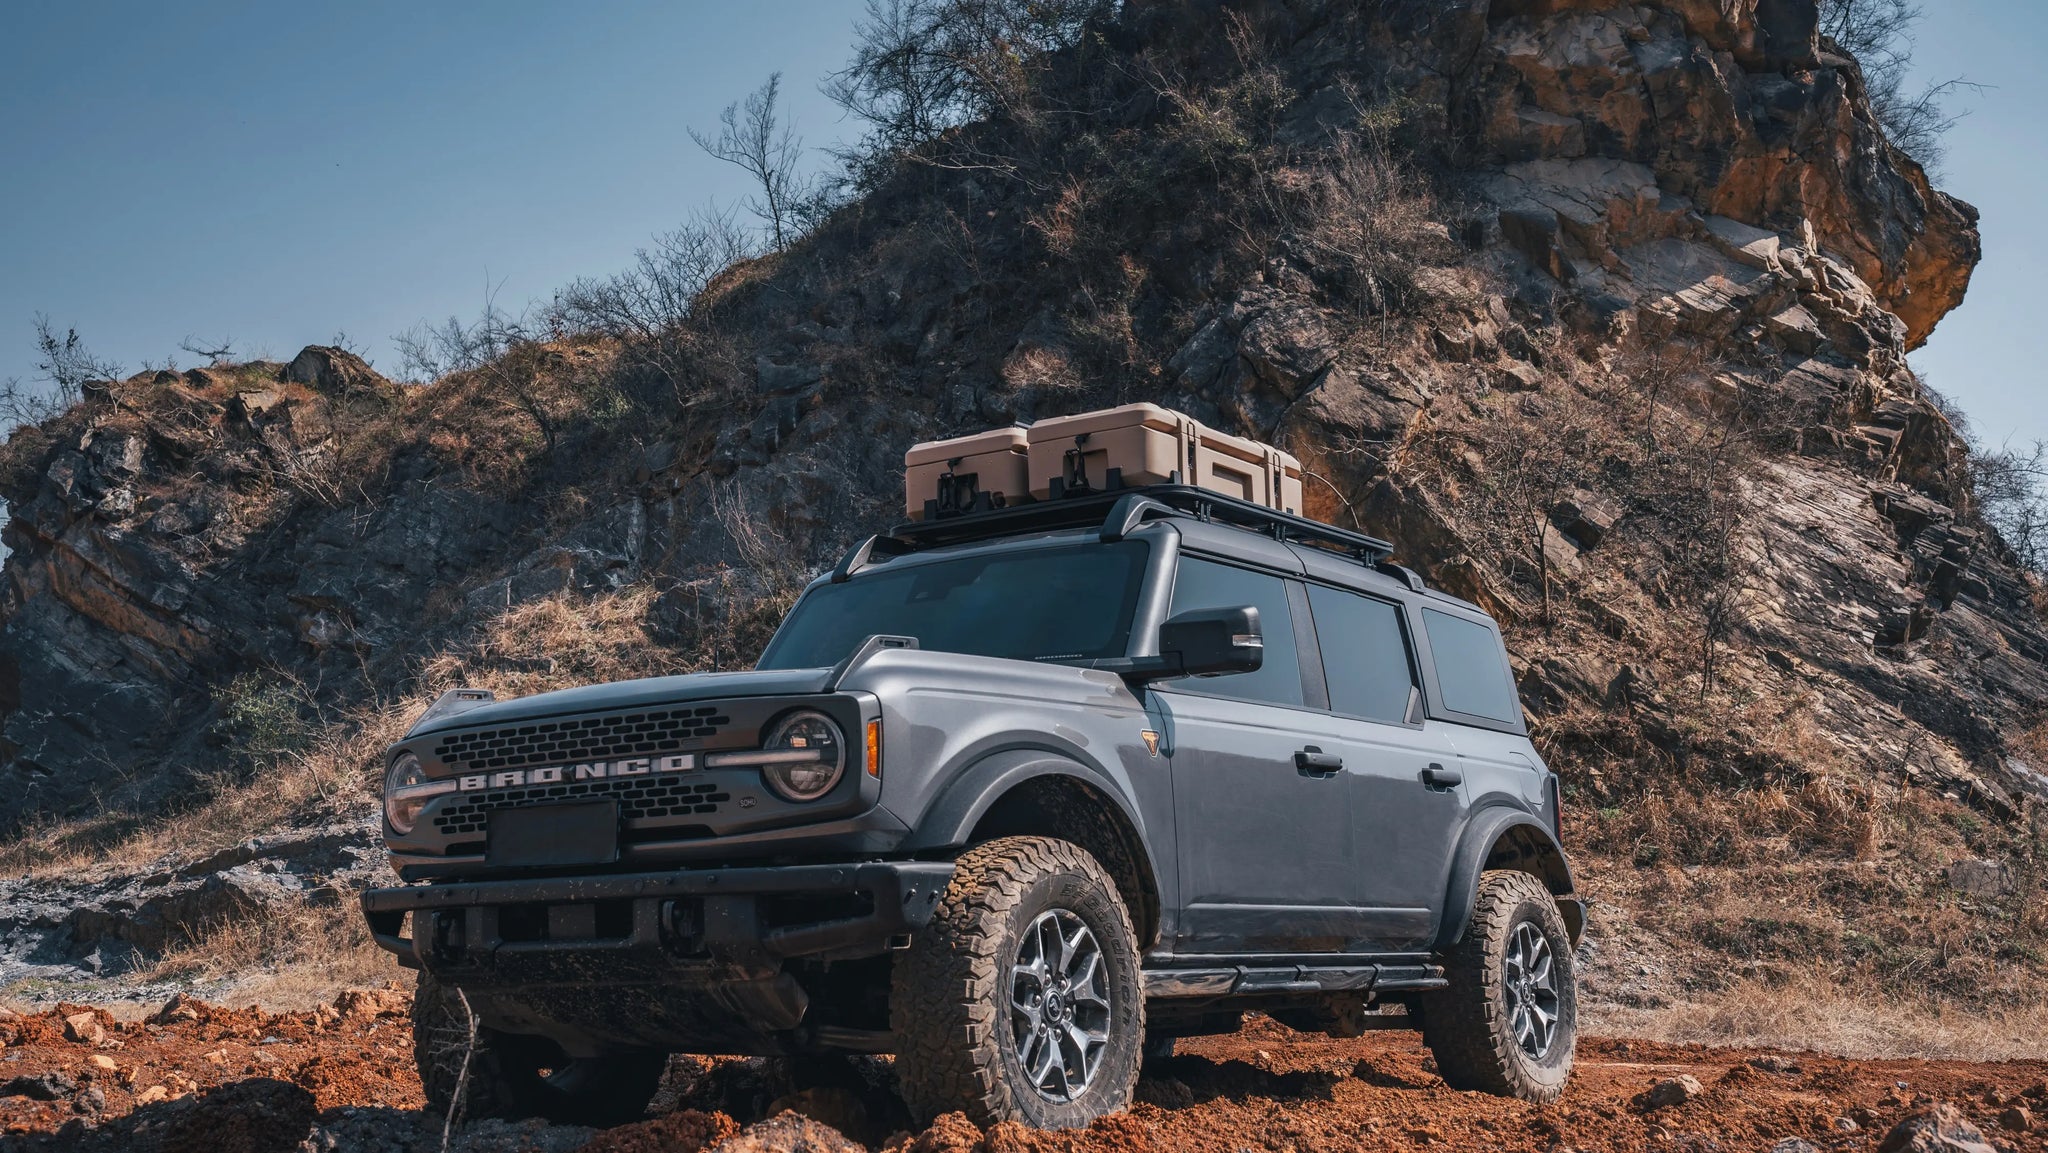
Start Here: Roof Racks for the Bronco (what matters more than looks)
Roof racks are one of those upgrades that look simple until you live with one every day.
What matters most is not the photo. It’s how it behaves at:
- 35 mph with the windows cracked,
- 75 mph into a headwind,
- and on washboard roads where vibration finds weak hardware.
The two main roof rack types
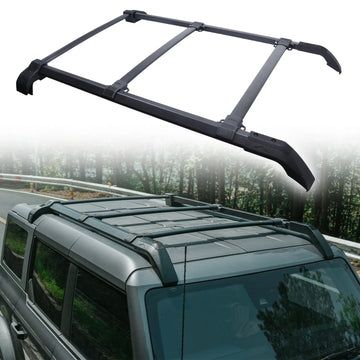
1) Cross bars
Best when you want:
- A lighter, simpler setup
- Lower cost
- The ability to carry bins, boards, light kayaks, bikes, or a slim cargo box
- Something that doesn’t permanently turn your roof into a big platform
2) Full platform racks
Best when you want:
- Maximum modularity (lots of mounting points)
- A larger footprint for odd-shaped loads
- A more “overland” style and capability
- A base for complex setups (awnings, multiple cases, etc.)
Most owners should start with cross bars unless they already know they need a full platform.
Key decision criteria (the stuff that matters after week two)
- Load needs: are you carrying a couple of bins or supporting a rooftop tent plan?
- Clearance: garage height matters more than you think.
- Modularity: will you add mounts later?
- Daily-drive comfort (noise): this is where many racks lose people.
Aerodynamic roof rack systems (in simple terms)
Airflow is either:
- smooth (quiet-ish), or
- turbulent (whistly, buffety, annoying).
Low-profile designs and cleaner bar shapes tend to disturb airflow less-so you usually get less noise and less drag.
That’s exactly why the Broaddict Roof Rack Cross Bar Kit has become a popular “first-step” upgrade: it’s the simplest way to add real carrying capability without committing to a full platform right away.
If you’re at that “okay, I need to carry more stuff” moment, this is where a Shop Now decision actually makes sense-because cross bars unlock the rest of the build.
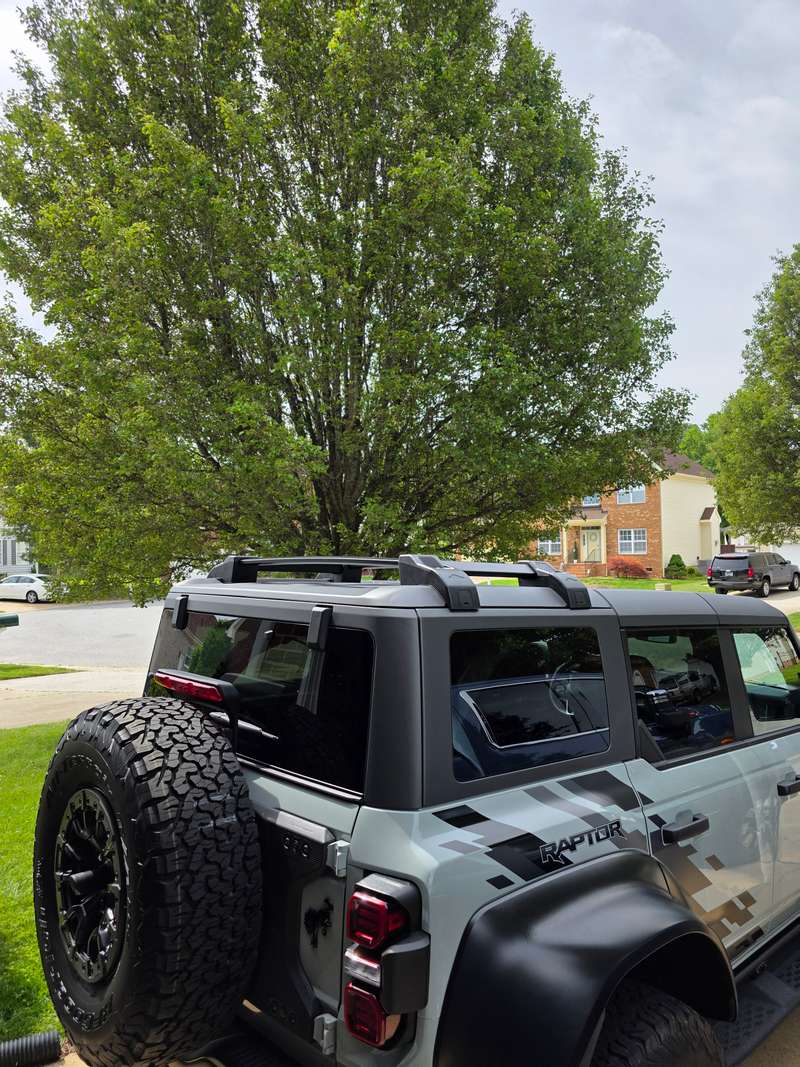
Broaddict Roof Rack Cross Bar Kit Review (Ford Bronco 2021–2025): Build quality, design, and real-world use
Let’s talk about the Broaddict Roof Rack Cross Bar Kit the way owners actually evaluate it: not as a spec sheet, but as a day-to-day foundation.
Fitment: who it’s for (and what to verify)
Broaddict positions this cross bar kit for 2021–2025 Ford Bronco 2-Door and 4-Door models.
Before you buy, you should still verify:
- Your exact model year
- 2-Door vs 4-Door
- Trim and roof configuration notes provided at purchase
That’s not a “Broaddict thing,” that’s a “roof rack thing.” Broncos have multiple roof setups, and fitment details matter.
Materials and construction: why aluminum is the right default
Broaddict highlights aluminum construction, and that’s usually the sweet spot for cross bars because it balances:
- Weight: lighter on the roof, easier to handle during install
- Corrosion resistance: helpful if you deal with salt, rain, mud, snow
- Durability: strong enough for real outdoor use without overbuilding
Steel can be strong, but it’s heavier, and corrosion becomes a bigger long-term story if coatings get scratched up from gear and trail dust.
Real-world use cases (what people actually mount)
Cross bars are about options. With a solid set of bars, most owners end up carrying things like:
- Camping gear boxes (light but bulky items)
- Recovery boards (especially if you don’t want them inside the cabin)
- Light kayaks or paddleboards
- Bikes (with the right mounts)
- Rooftop tent setups (with a big asterisk below)
Rooftop tent note (important)
If your plan includes a rooftop tent, confirm:
- The dynamic and static load ratings you need (and what your roof/vehicle is rated for)
- Compatibility with your tent’s mounting footprint and required bar spacing
Cross bars can be part of a tent setup, but “it bolts on” isn’t the same as “it’s properly rated.”
Daily driving experience: stability, crosswind behavior, and sound
The day-to-day questions are always the same:
- Does it feel stable at highway speeds?
- Does it shift or loosen?
- Does it make the Bronco louder?
In general, a properly installed cross bar kit should feel locked in—no movement, no rattles, no shifting under normal use.
Crosswinds are where you notice roof setups most. A higher, bulkier roof load catches more wind. With cross bars alone (and no giant box), most of the “feel” comes down to:
- How clean the bar profile is,
- How low the setup sits,
- And how you position the bars and accessories.
Sound is similar: cross bars by themselves can be pretty livable, but bar placement and add-on mounts can change everything (more on that below).
Value assessment: what you’re getting vs “premium” racks
This is where Broaddict tends to win attention: value.
A lot of premium rack systems are excellent—but they can cost enough that new owners either:
- postpone the upgrade, or
- buy cheap universal parts and regret it.
A value-focused cross bar kit makes sense if you want:
- Real cargo capability now,
- A clean foundation for future add-ons,
- Without paying top-tier platform-rack pricing.
If you’re ready to add roof utility without overcomplicating the build, this is the moment where “Buy Now” is rational—because cross bars aren’t a “nice-to-have” accessory; they’re a gateway to carrying the gear that makes the Bronco lifestyle easier.
Roof Rack Noise: The real causes (and why some racks whistle like crazy)
Roof rack noise feels mysterious until you know what’s happening.
Noise usually comes from turbulent airflow-air breaking up and swirling as it hits edges, gaps, and add-ons.
The most common causes of roof rack noise
- Bar profile: square/boxy shapes tend to whistle more than aero-shaped bars.
- Gaps and channels: even small openings can create high-pitch noise at certain speeds.
- Bar placement: a bar placed in a “bad” airflow zone can resonate like an instrument.
- Accessory mounts: clamps, brackets, and mounts can act like little flutes.
Common sound types (and when they show up)
- Whistle: usually starts at specific speeds (often around highway speeds) and can be very pitchy.
- Low-frequency hum: more constant, can feel like a “drone.”
- Buffeting: more like pressure pulses, often worse with headwinds or when windows/sunroof are open.
Why Broncos can be sensitive
The Bronco has a more upright profile than many SUVs. That means:
- wind hits the front and roofline harder,
- airflow breaks earlier,
- and roof additions can be more noticeable.
That’s why “quiet roof racks” usually focus on:
- aero profiles
- low height
- wind management add-ons (like strips or fairings)
- and better fitment
How to Reduce Wind Noise While Driving (practical fixes that don’t require a new rack)
Before you replace anything, try this. A lot of roof noise is fixable with small adjustments.
1) Adjust bar placement (forward/back)
Move bars slightly forward or backward and test.
Why it works: you’re changing where airflow hits the bar and whether it resonates with the roofline.
Do it in small increments. Then road test.
2) Confirm alignment and torque
Noise can come from tiny misalignment.
- Make sure bars are level and square.
- Confirm equal spacing side-to-side.
- Re-check torque (don’t guess).
3) Strap and cable management (the sneaky culprit)
Loose straps can turn into a guitar string in the wind.
- Tuck and secure strap tails.
- Remove unused bungees.
- Don’t let anything flap.
4) Accessory positioning matters more than you think
Mounts and gear create turbulence.
- Rotate traction boards.
- Reposition cases.
- Move tall items rearward where possible.
5) Road-test method (don’t change five things at once)
Change one variable at a time. Note:
- the speed where noise begins,
- whether headwinds make it worse,
- and which adjustment improves it.
Aerodynamics 101 for Bronco Roof Racks: Quiet, stable, and less drag
You don’t need to be an engineer to understand roof rack aerodynamics. Picture it like this:
- Smooth airflow = less noise, less drag.
- Broken airflow = more noise, more drag.
Why low profile helps
The higher the rack sits, the more it catches moving air like a scoop.
Low-profile setups reduce:
- the “front edge” exposed to wind,
- and the size of turbulent pockets.
Cross bar shape: aero vs square
- Aero-shaped bars tend to reduce whistling and drag.
- Square bars tend to be louder and less efficient (but can be cheaper and sometimes easier for certain clamps).
When a wind fairing helps most
A fairing can help if:
- you have a taller setup,
- you’re running a front-heavy platform,
- or your specific roof/bar combo creates a nasty whistle.
What “aerodynamic roof rack system” should actually mean
Not just marketing words. It should imply:
- a cleaner bar profile,
- a lower install height,
- and options to manage airflow when needed.
And this is where the Broaddict cross bar kit can shine if you install and position it correctly: a clean, stable cross bar foundation gives you a better shot at quiet driving than a taller, messier setup full of random mounts.
Fuel Efficiency with Roof Racks: What to expect (and how to minimize the hit)
Let’s set expectations: any roof rack can reduce fuel efficiency.
Sometimes it’s small. Sometimes it’s noticeable. The biggest drivers are:
- speed (drag increases fast as you go faster),
- and frontal area (what you’re forcing the air to push through).
How roof racks impact fuel consumption (simple explanation)
At higher speeds, your engine works harder mostly because of aerodynamic drag.
- Cross bars alone can have a modest effect.
- Add a big box, traction boards, or tall gear and the penalty increases quickly.
How to reduce the MPG penalty
- Remove bars when you don’t need them (best fix, if you’re willing).
- Keep it low profile.
- Avoid driving around with an empty bulky box.
- Improve airflow with a wind strip/fairing if whistling and drag are obvious.
Practical driving tips for long trips
- Keep a steady speed (big speed swings waste fuel).
- If you’re pushing into heavy headwinds, expect MPG to drop—gear up top magnifies that effect.
Buying a more aerodynamic, quieter setup isn’t only about comfort. It can also help reduce drag compared with louder, higher, messier configurations.
Accessory Pairing Guide: What to mount on your Broaddict cross bars (without turning the roof into a wind instrument)
The secret to a good roof setup is restraint.
Just because you can mount ten things doesn’t mean you should.
Camping-focused setup (quiet and practical)
A clean, low-noise combo usually looks like:
- A slim cargo box or well-secured cargo bag (keep it tight and low)
- Traction boards mounted in a low-profile way
- Shovel/axe mounts tucked where they don’t catch clean airflow at the front edge
Tip: keep the very front area clean. That’s where wind first hits and where noise often starts.
Rooftop tents: checklist before mounting
Before you treat cross bars like a tent platform, confirm:
- Load ratings (vehicle + rack + bars)
- Bar spacing required by your tent
- Balanced positioning (not too far forward)
- A plan for added noise and MPG change (because tents are basically wind blocks)
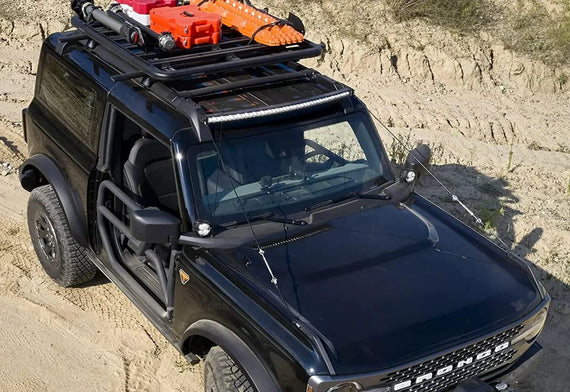
Off-road trips: prioritize quick-access gear
If you’re using the roof for trails:
- prioritize gear you want outside (muddy boards, dirty tools),
- but don’t stack tall items that catch wind and shift weight up high.
Safety and practicality rules (non-negotiable)
- Keep weight centered.
- Avoid overhang.
- Re-check fasteners after the first drive (and after the first rough trail section).
Noise-aware mounting (small choices = big difference)
- Place bulky items slightly rearward when possible.
- Keep straps tucked and trimmed.
- If you get a persistent whistle, consider a wind strip/fairing and re-test bar placement.
Installation and Setup Notes (what to double-check for a clean, quiet install)
Keeping this brand-agnostic (because you should follow the exact Broaddict documentation for your kit), here are universal best practices that prevent 90% of problems.
Pre-install checklist
- Clean roof mounting areas (dirt can affect fit and torque)
- Basic tools ready
- Read fitment notes carefully (2-Door vs 4-Door, roof configuration)
Core setup principles
- Spacing: consistent spacing helps stability and accessory fit.
- Alignment: square and level matters for both noise and security.
- Torque: too loose causes movement; too tight can damage components.
Small misalignment can increase noise because airflow becomes uneven—and uneven airflow is loud.
Post-install verification
- Do a shake test (nothing should shift)
- Re-torque after initial miles (especially after highway driving)
- Periodically check if you go off-road (vibration loosens what highways don’t)
Troubleshooting common issues
- Uneven bar height: re-seat and confirm mounting surfaces are clean
- Shifting: re-check torque and hardware order
- Persistent whistling: adjust bar placement, check for gaps, manage straps, consider wind management add-ons
- Accessory clamp interference: verify clamp size/position and re-space bars if needed
Real-World Scenario: Packing for a Yellowstone National road trip in a Bronco
Let’s make this real. Picture a 3–5 day Yellowstone trip with a mix of highway miles, park roads, and a little dirt.
A realistic packing list
- Cooler + food bin
- 2–3 camp bins (stove, cookware, dry food, misc.)
- Chairs + small folding table
- Sleeping gear (bags, pads)
- Recovery kit (strap, shackles, basic tools)
- Camera gear / daypack
- Rain layers, boots, etc.
What goes on the roof vs inside (the smartest split)
On the roof (light + bulky):
- camp bins (if weatherproof and secured)
- chairs/table
- traction boards (dirty items live outside)
Inside the Bronco (heavy + valuable):
- cooler (heavy, keep low and centered)
- recovery kit (heavy, keep low)
- camera gear (valuable)
- anything you don’t want stolen at a quick stop
This is why cross bars are such a good first upgrade: they let you move the bulky stuff up top without turning the cabin into a storage locker.
Noise and MPG strategy for long highway stretches
Before you leave town:
- test bar placement at highway speed (even one adjustment can change the sound)
- tuck every strap tail
- if you hear whistling, fix it before you commit to 800 miles of it
Quick stop routine (simple checklist)
At fuel stops:
- check straps tension
- confirm mounts haven’t shifted
- quick visual scan of hardware
Why a solid cross bar foundation matters
If the base is stable, everything else gets easier:
- less movement
- less noise
- fewer “is my gear still up there?” moments
That’s the core value of a well-chosen cross bar kit.
Is Broaddict Worth It? Who should buy (and who should look elsewhere)
Broaddict is a strong fit if you’re:
- A Bronco owner who wants functional upgrades at a reasonable price
- A weekend camping / off-road user who needs cargo flexibility
- A first-time roof rack buyer who wants a solid foundation without jumping straight to a full platform
You might want to look elsewhere if:
- You need an extreme-duty, full-length platform system from day one
- You have very specific rooftop tent requirements and want a system built primarily around that
- You want ultra-premium “set it and forget it” noise performance at any cost
Quick decision checklist (use this before you click)
- What load rating do I require (today and later)?
- What noise level am I willing to accept (and will I fine-tune placement)?
- What am I mounting first (box, boards, bikes, tent)?
- 2-Door or 4-Door—and have I confirmed roof/trim fitment?
If you can answer those cleanly, this is where it’s reasonable to Shop Now—because you’re not browsing anymore, you’re choosing a foundation.
And if your profile matches the “functional, affordable, Bronco-specific” buyer, this is also the right moment to Buy Now and stop overthinking it.
Wrap-up: Build your Bronco in the right order (and keep it quiet)
The best Bronco builds follow a simple order:
- Start with utility (roof rack/cross bars).
- Optimize for airflow and noise (positioning + wind management).
- Add accessories intentionally (don’t stack random gear and hope).
One-sentence reminder that saves a lot of frustration: most roof rack noise is fixable with bar positioning, wind management (strip/fairing), and clean mounting/strap discipline.
Your next step is straightforward:
- Pick your accessory goal,
- confirm fitment for your 2021–2025 Bronco,
- and build a simple, aerodynamic setup before adding more gear.
If you’ve confirmed your needs and fitment, this is the point where it makes sense to Shop Now / Buy Now and start building.
READ MORE: trendyber.com
Recommended for you
 Huega House Review: Is This the Premium Headwear Brand You’ve Been Looking For?
 Why Athletes Are Switching to Salt Athletic Gear Bags
 How Salt Athletic Helps You Get Rid of Smelly Cleats for Good
 Of Elven Make: The Go-To Brand for Enchanting Accessories
 From Standard Earbuds to Custom Sound: How WAVS Custom Helps You Hear Better (And Work Better)
 Why Custom-Fit Earphones Change Everything: A Deep Dive Into WAVS Custom IEMs